In what follows we provide a step-by-step guide how to pre-order your OtoCo tokens.
We wrote this with non-crypto native users in mind in the hope to make it easier for them to also participate. We do assume they already have an Ethereum wallet.
1. Choose a wallet
First, choose a wallet you’ll be using to pre-order tokens from and eventually receive your purchased tokens in.
In addition to whichever amount of DAI, USDC or USDT you earmarked towards your pre-order, your wallet will also need some Ether (ETH) to cover the transaction fees.
Note that these “gas fees” are not received by OtoCo but go to the network for confirming your transaction.
How much you’ll pay in gas fees depends on a number of factors, most importantly how congested the Ethereum blockchain is at the moment you place your pre-order.
2. Connect your wallet
Next, you will need to connect your wallet.
Simply go to OtoCo’s pre-order site and click on “Connect your Wallet” top right:
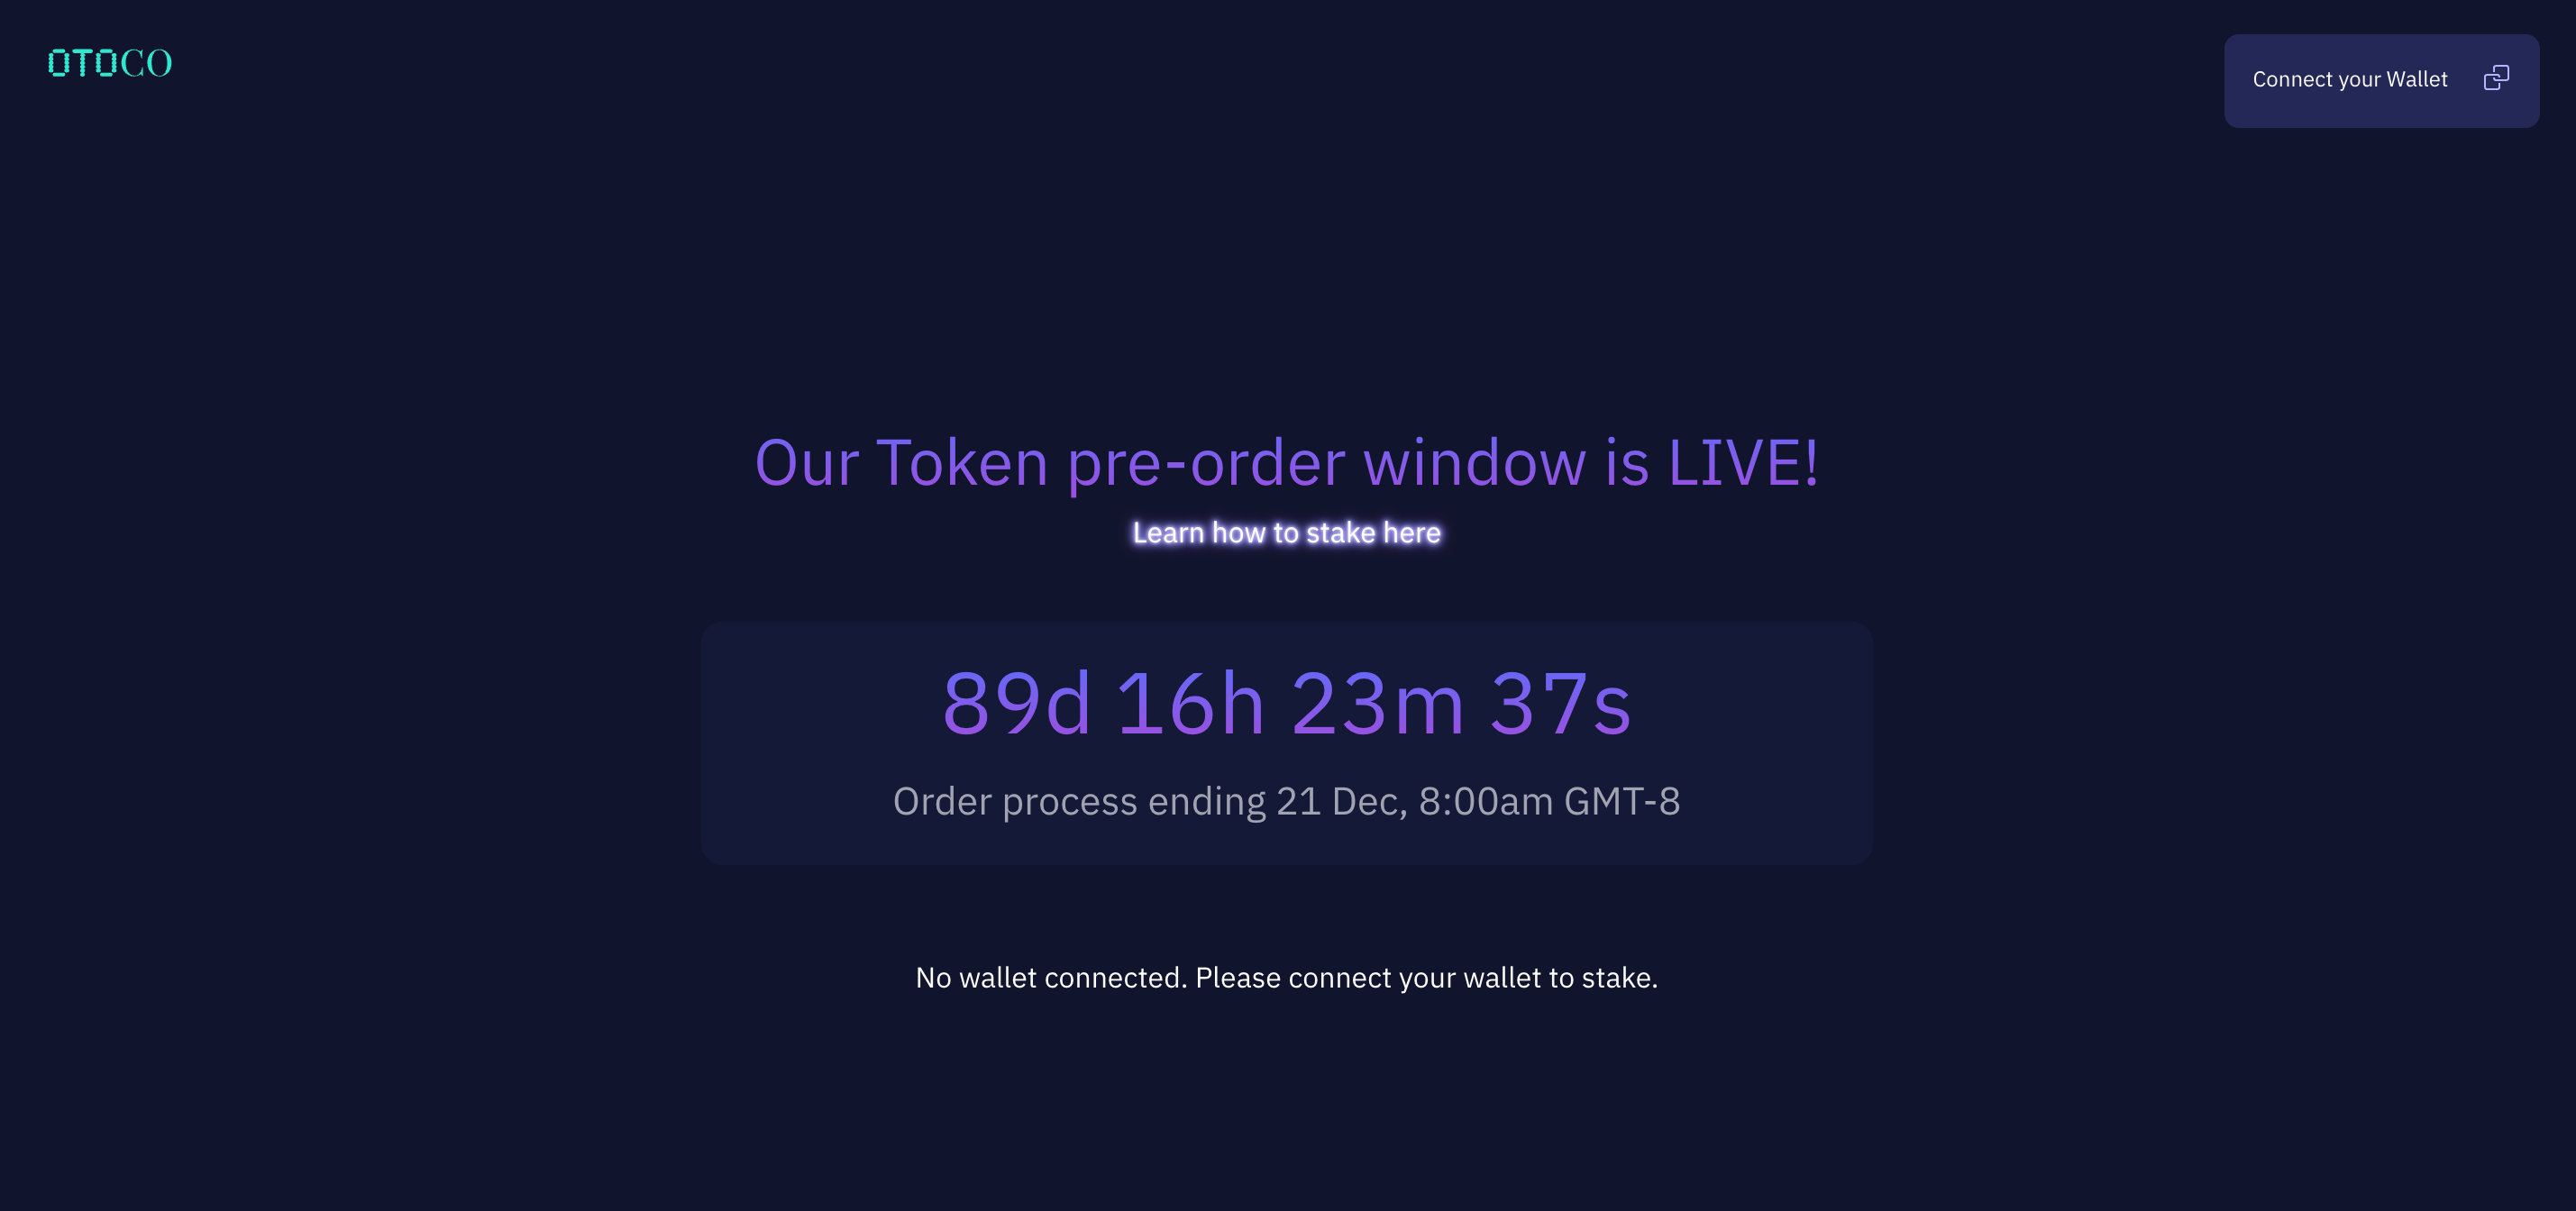
Check on the URL in your browser: it should always show https://otoco.io/launchpool/

You can open this site in any browser, either from your desktop or your phone:
Desktop
If you open the link in Apple Safari, you can simply scan the WalletConnect QR code.
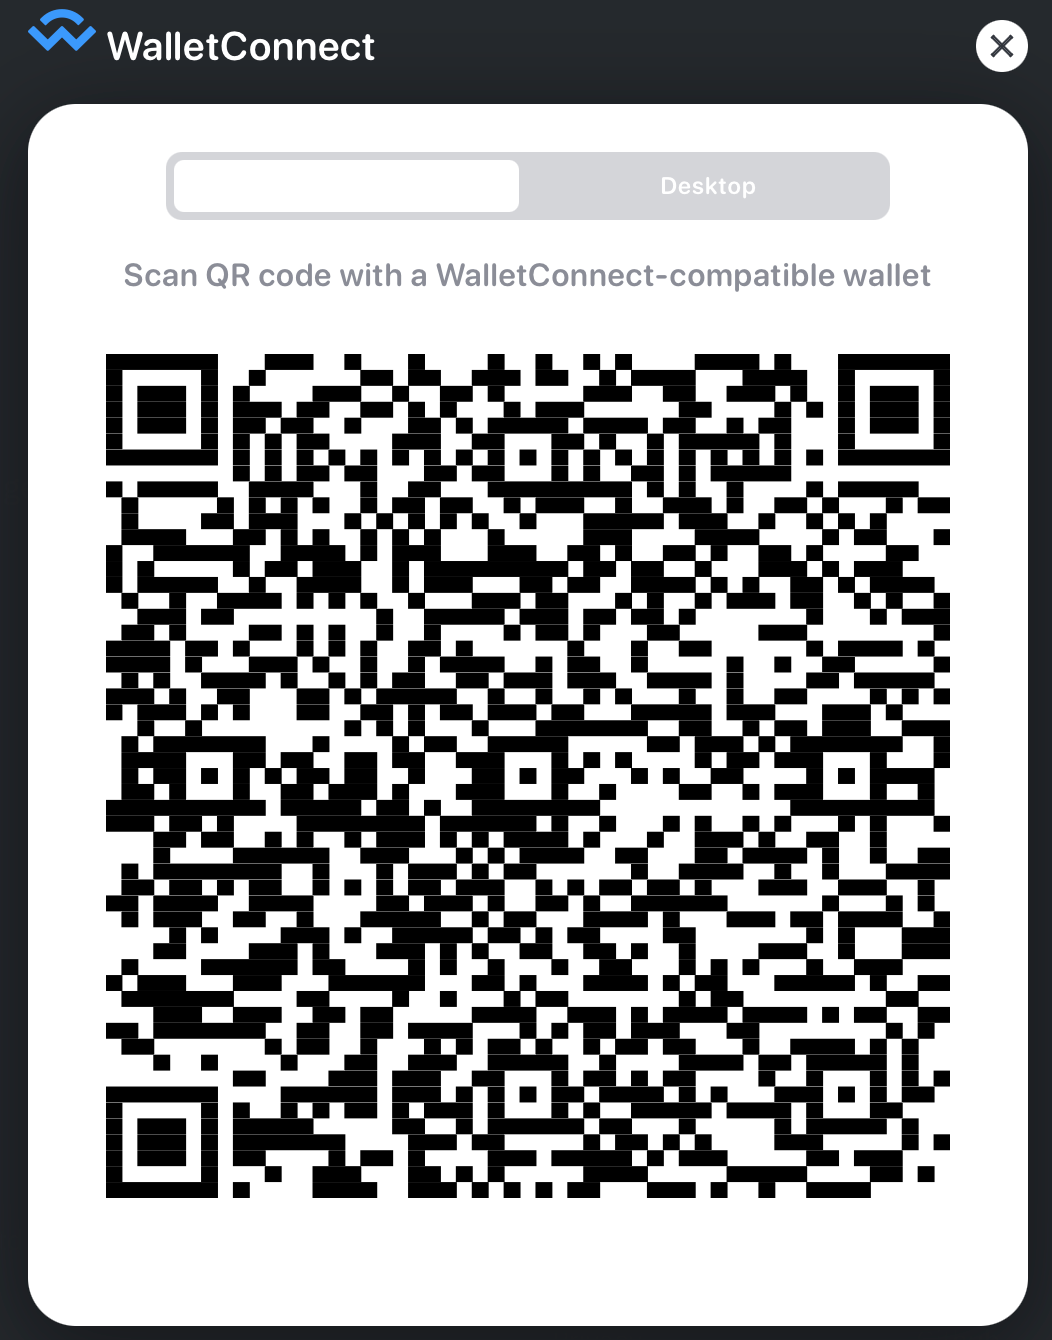
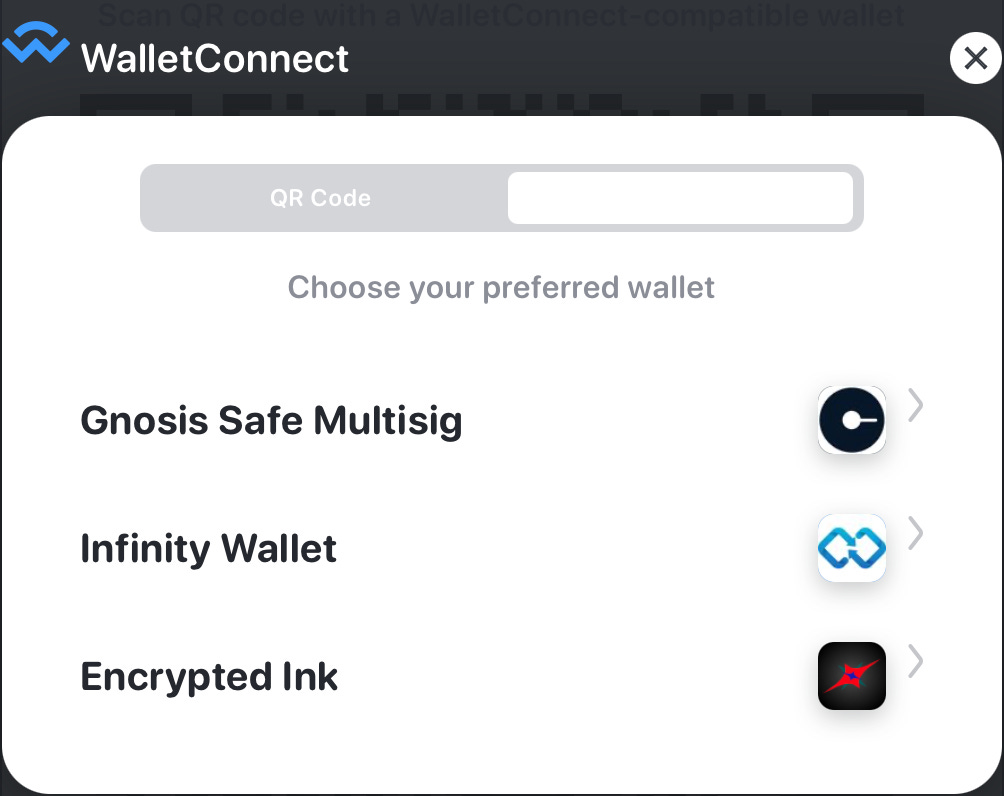
If you prefer to connect via your desktop, move the slider to the right and choose any of the 3 available wallets (Gnosis Safe Multisig, Infinity Wallet or Encrypted Link).
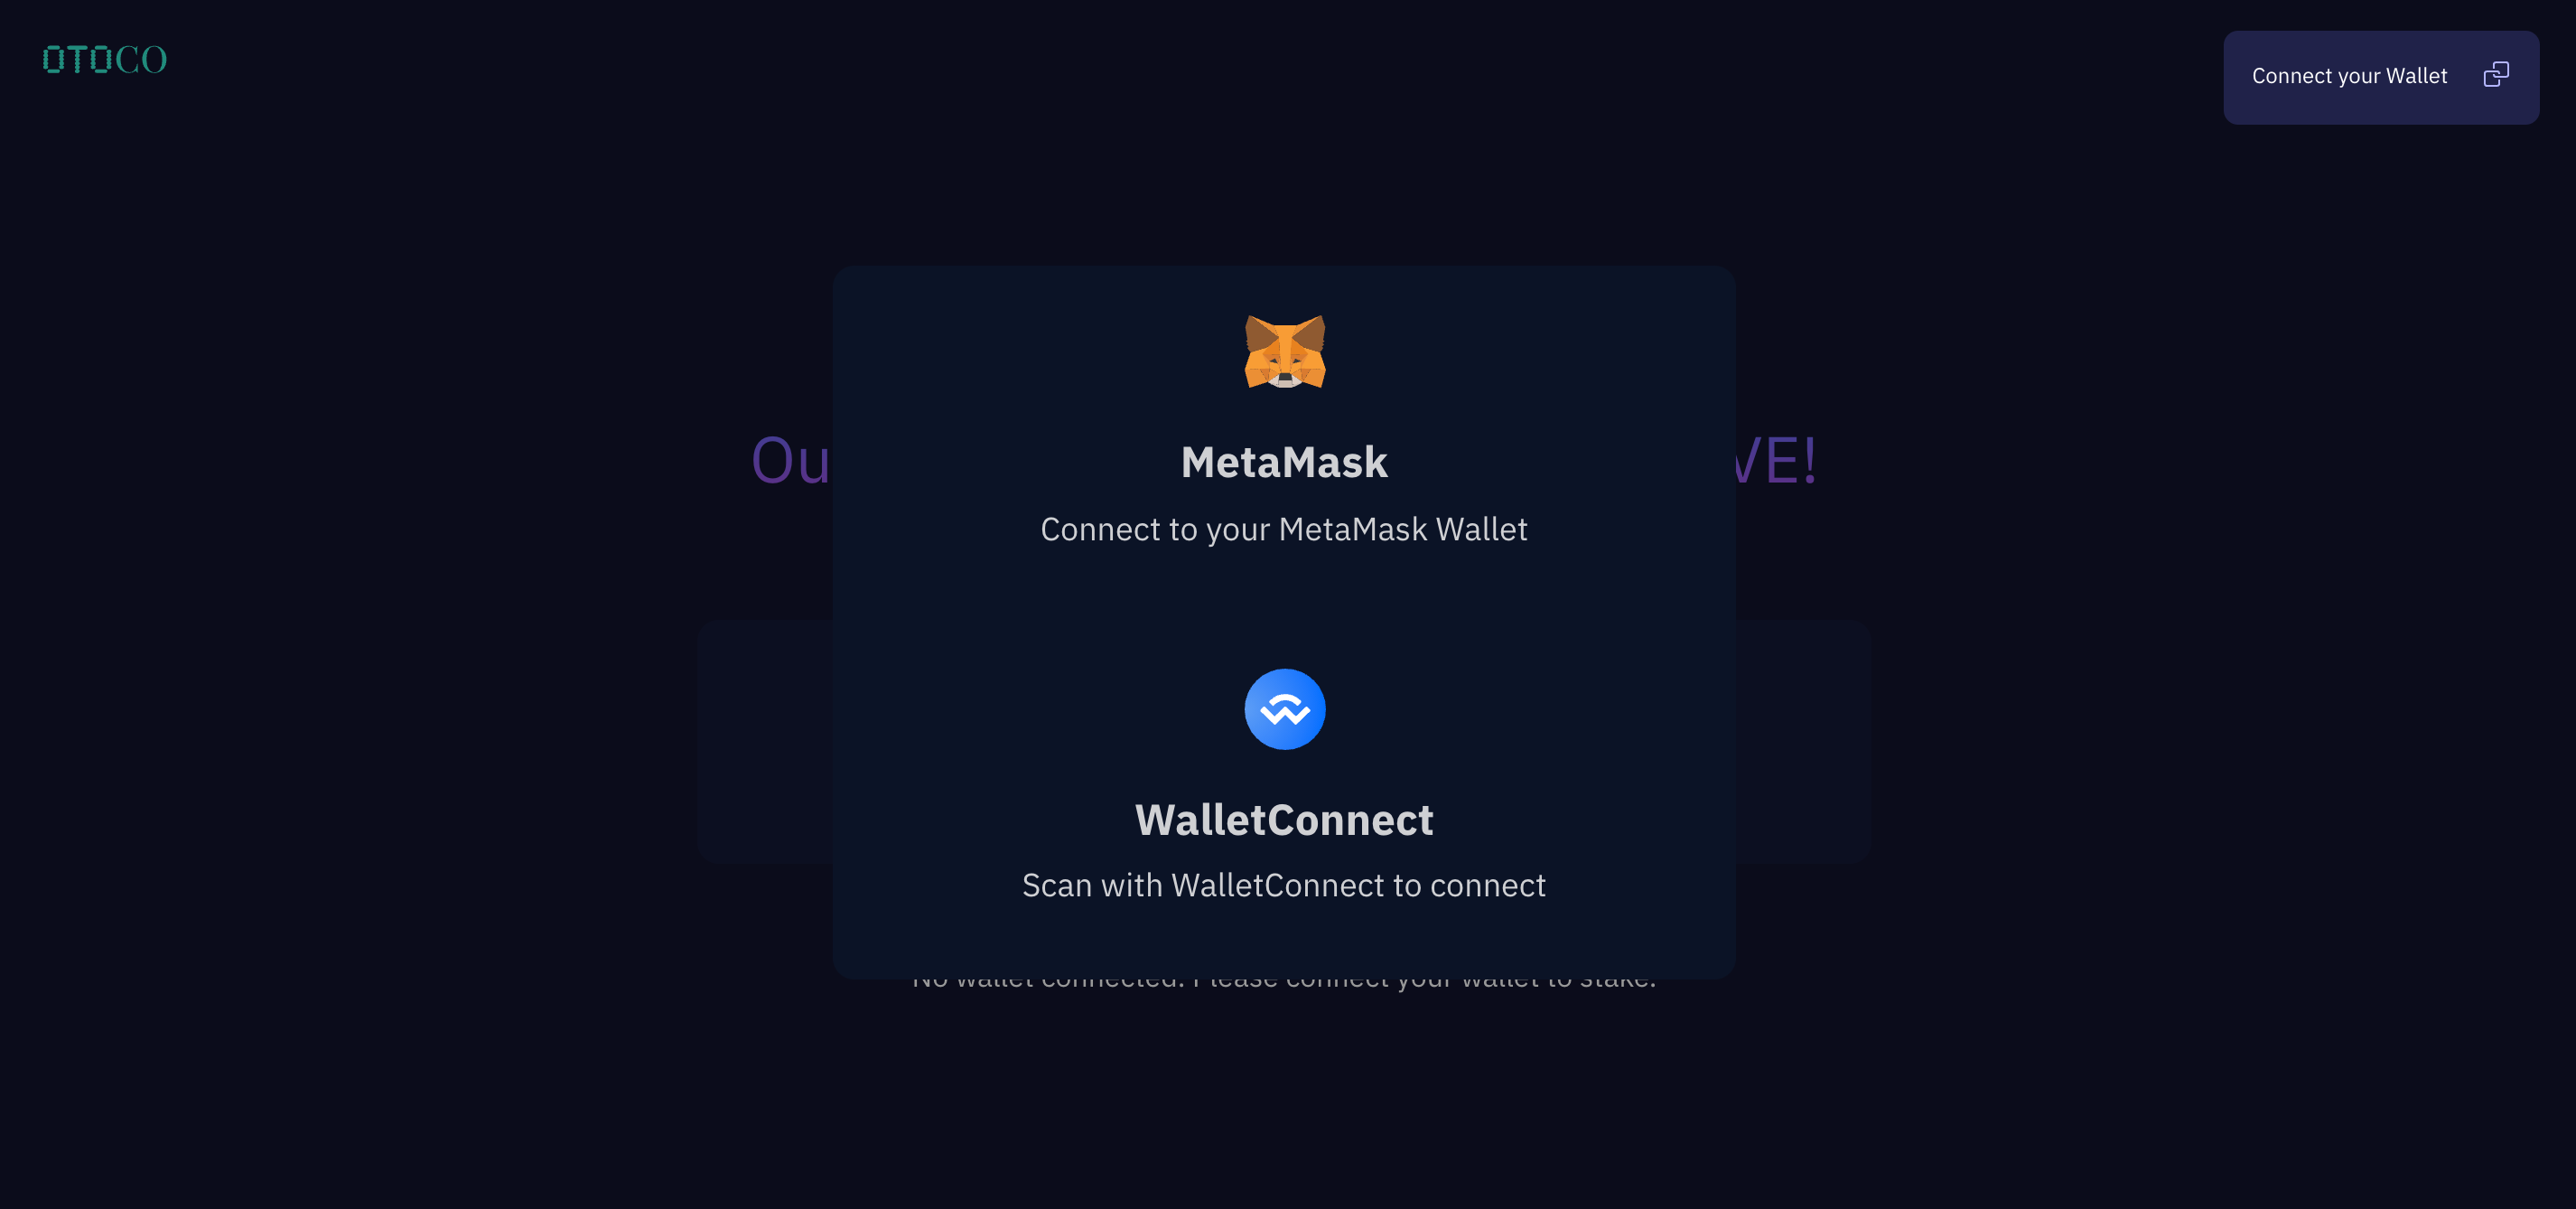
If you use Google Chrome, in addition to WalletConnect you will also see the option to use Metamask. If you do use Metamask, it is recommended to use the Chrome Metamask browser plug-in.
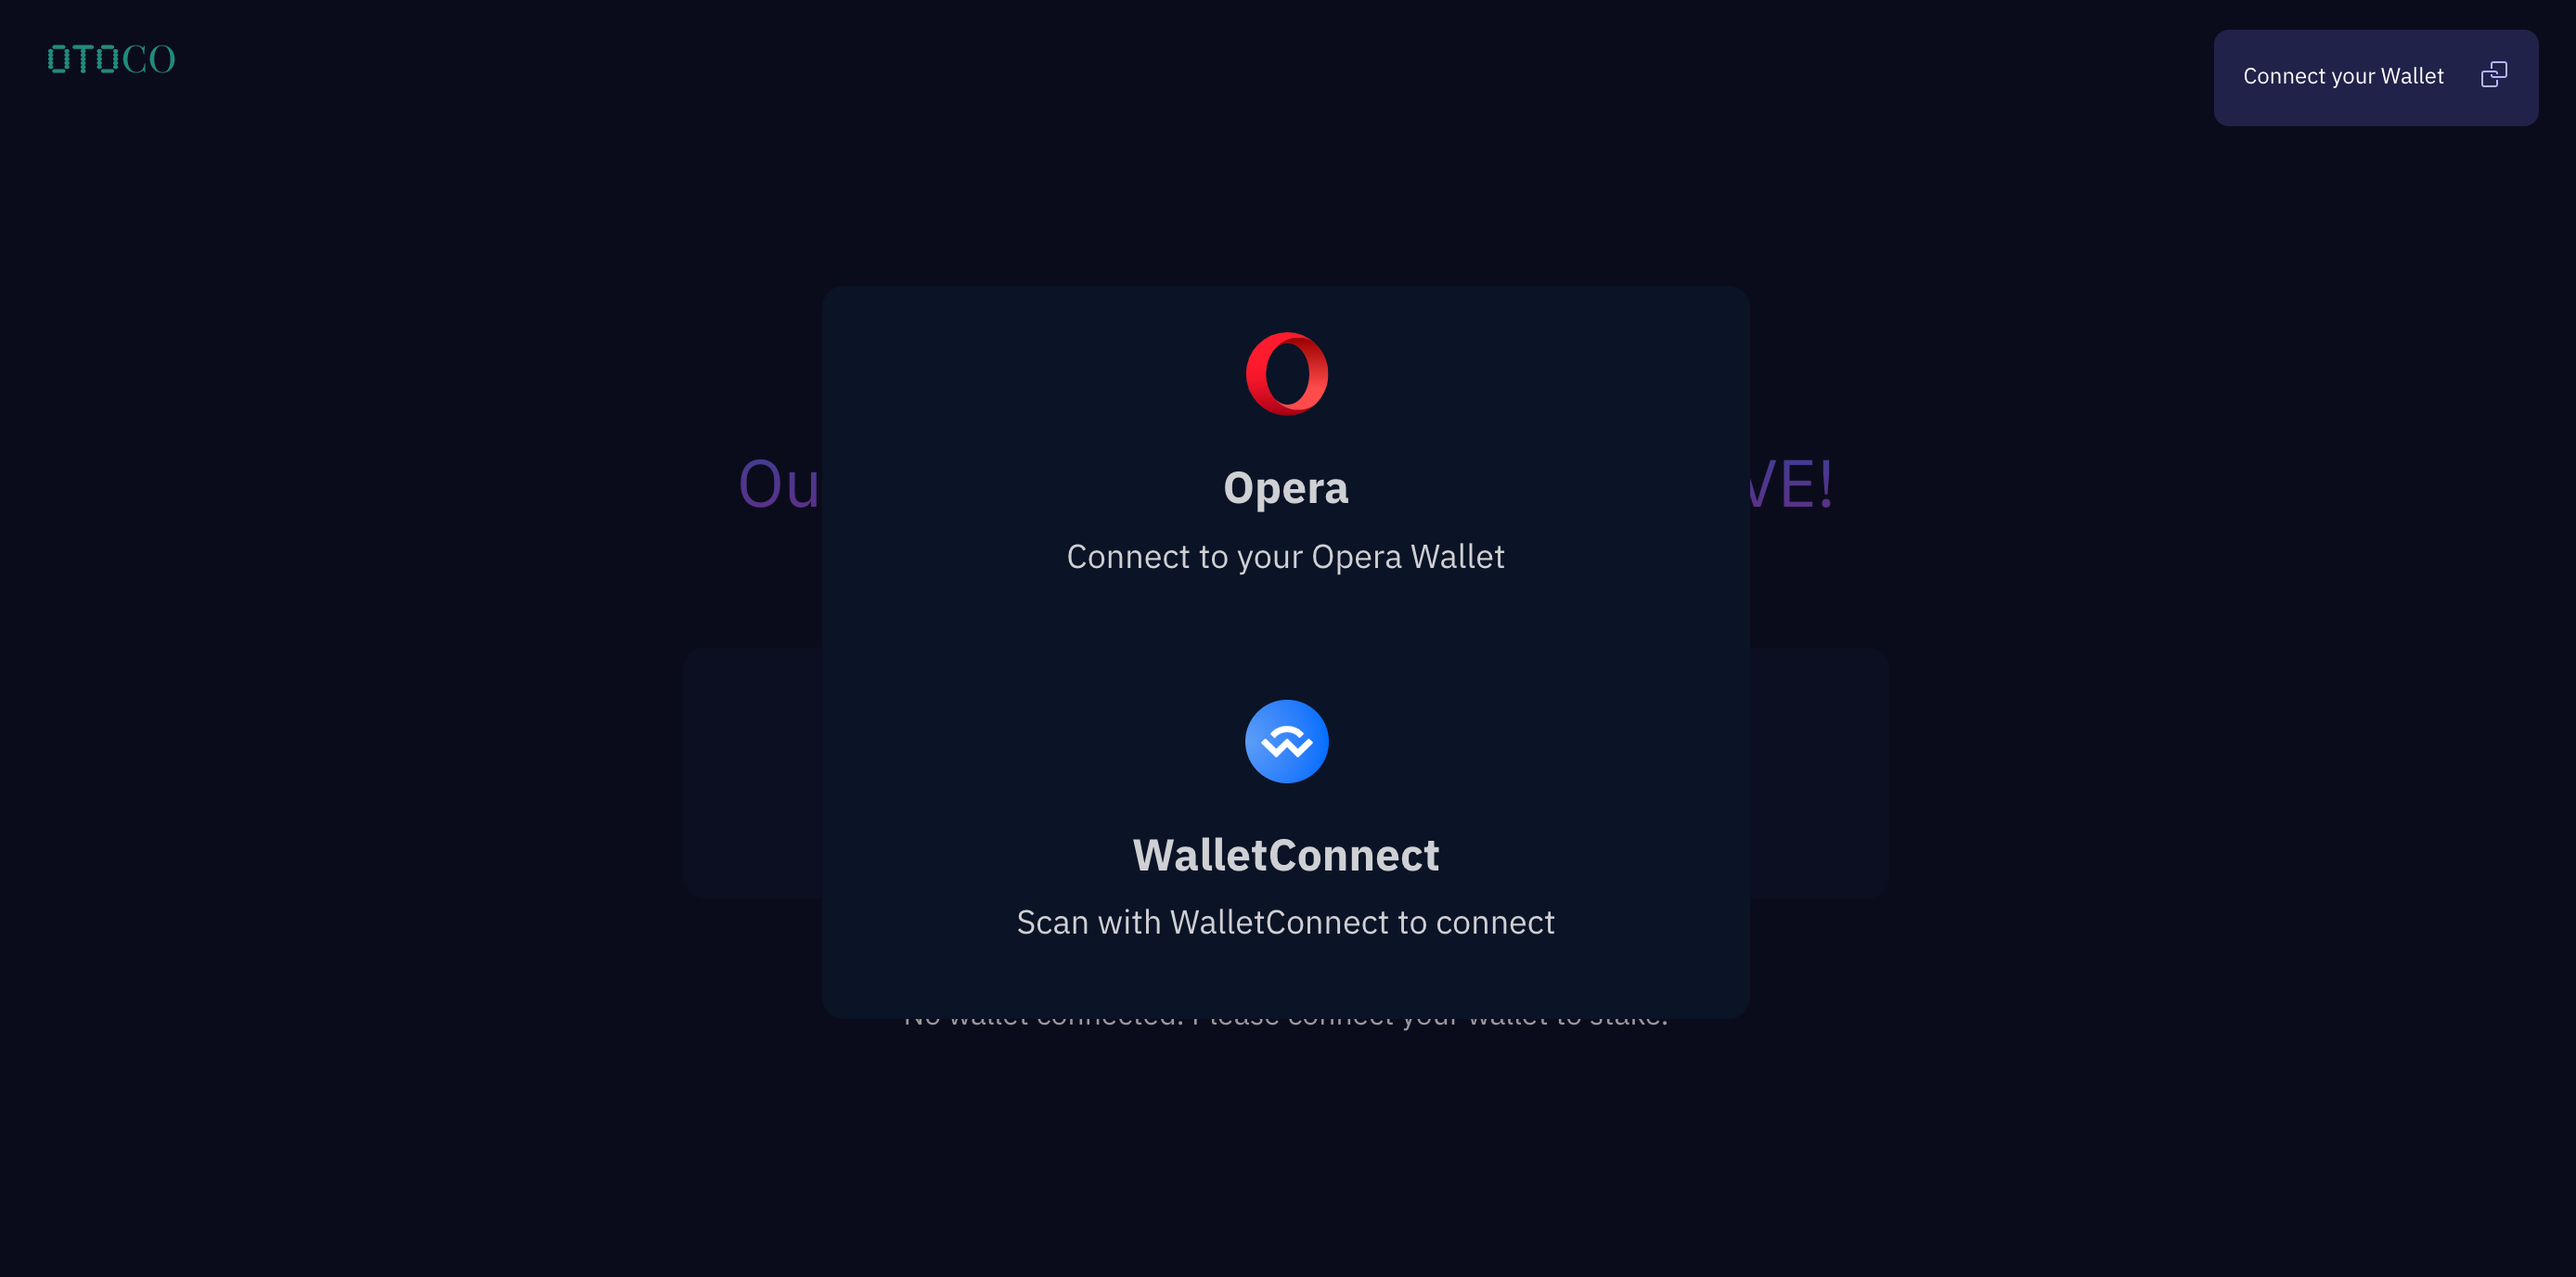
Other Web3 browsers too will let you connect with WalletConnect. Opera will also let you connect with the Opera wallet:
Mobile
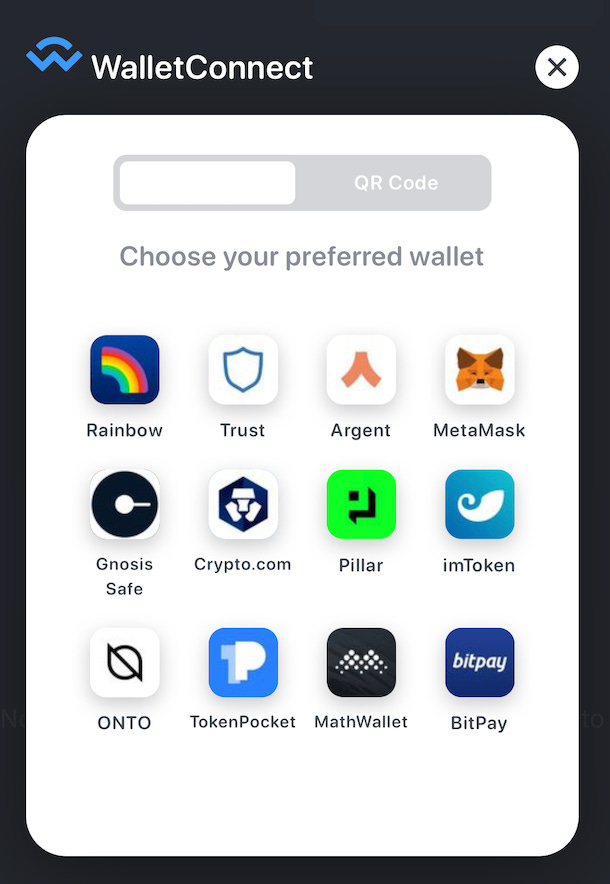
You can also connect your wallet from within a mobile browser which in addition to the WalletConnect QR code gives you even more wallets to connect with, including Rainbow, Trust wallet etc:
Or you can open the OtoCo site from within the status.im app and connect with your Status wallet.
3. Stake
With your wallet now primed, you can start “staking”.
Staking, for those who haven’t done this before, is when you decide to lock some crypto assets you hold in your wallet towards a specific transaction that will automatically execute on via a smart contract (a program that runs on blockchain).
The smart contract we built for the purpose of our pre-sale lets you stake any amount between USD 100 and USD 200,000 towards purchase of the OTOCO token at the end of the pre-order window at 8 A.M. Pacific Time on 21 December 2021.
At that time staked funds will automatically convert into OTOCO tokens. At any point before we close our pre-order window, you can “unstake” which means the funds you locked earlier are freed up again.
To lock your funds, simply click “Stake Now!”.
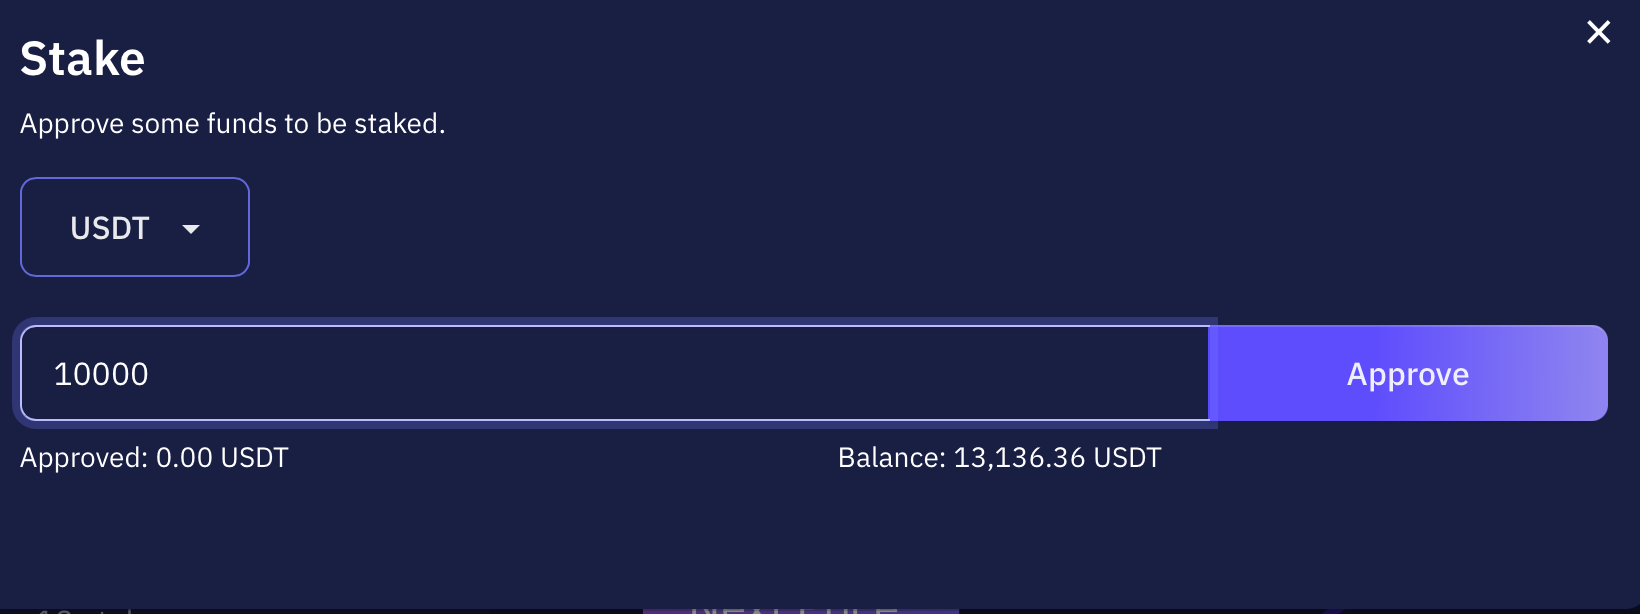
You will now see a panel pop-up that asks you to select the stabelcoin you want to stake from a dropdown menu.
The app will check the amount of your chosen stablecoin available in your wallet.
Specify the amount you want to approve towards staking and click “Approve”.
In our example below, we are about to approve USDT 10,000 towards staking:
This will trigger the first signature required to place your pre-order. You sign for this approval from within the wallet you connected with.
It may take a minute or so for the approval to be confirmed on blockchain and you will have spent some gas fees in Ether when signing this first transaction.
The second transaction is then to lock the amount you approved. This too requires a signature in the same way as the first transaction and will take around a minute to confirm.
Once confirmed, you will see what price you locked in and the total you have currently staked.
You can always check your stakes by clicking “Unstake”
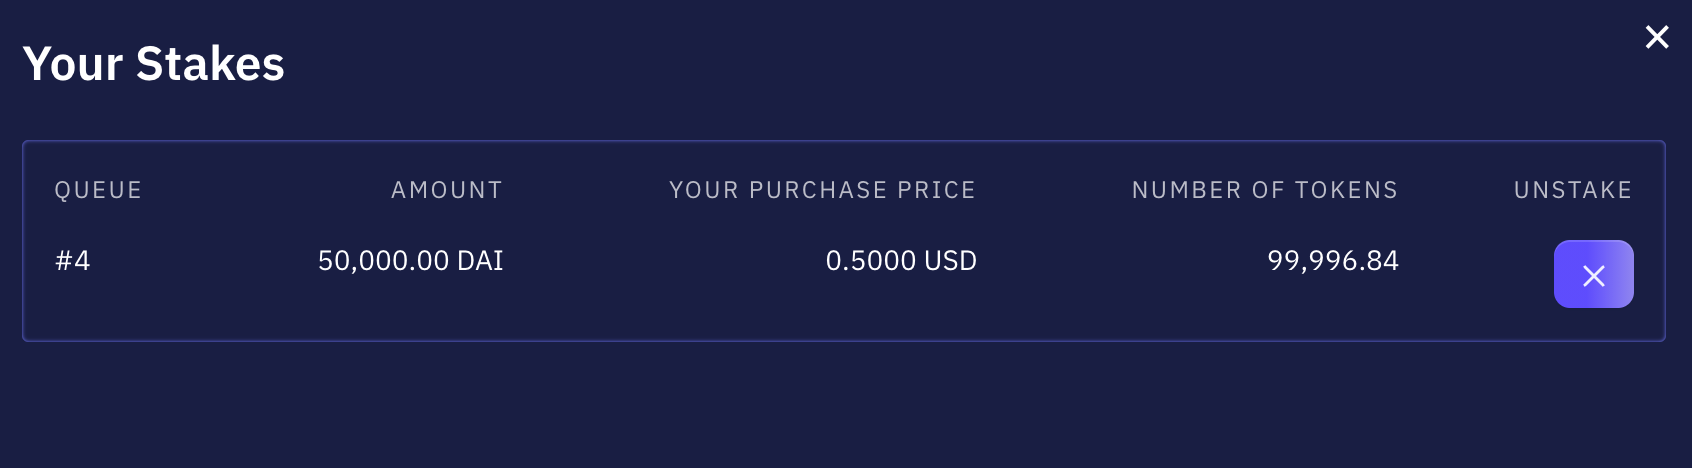
This panel shows:
- your number in the queue: this rank determines your purchase price if you remain staked until the pre-order window closes
- the amount you staked and in which stablecoin
- your purchase price
- the number of tokens you reserved at that price
Clicking the X in the Unstake column means you leave the queue and will forfeit the price you locked in.
RESOURCES
Read more on why you should stake early and how to lock-in the best price here.
Join our official Telegram group for all announcements and OtoCo-related chat.